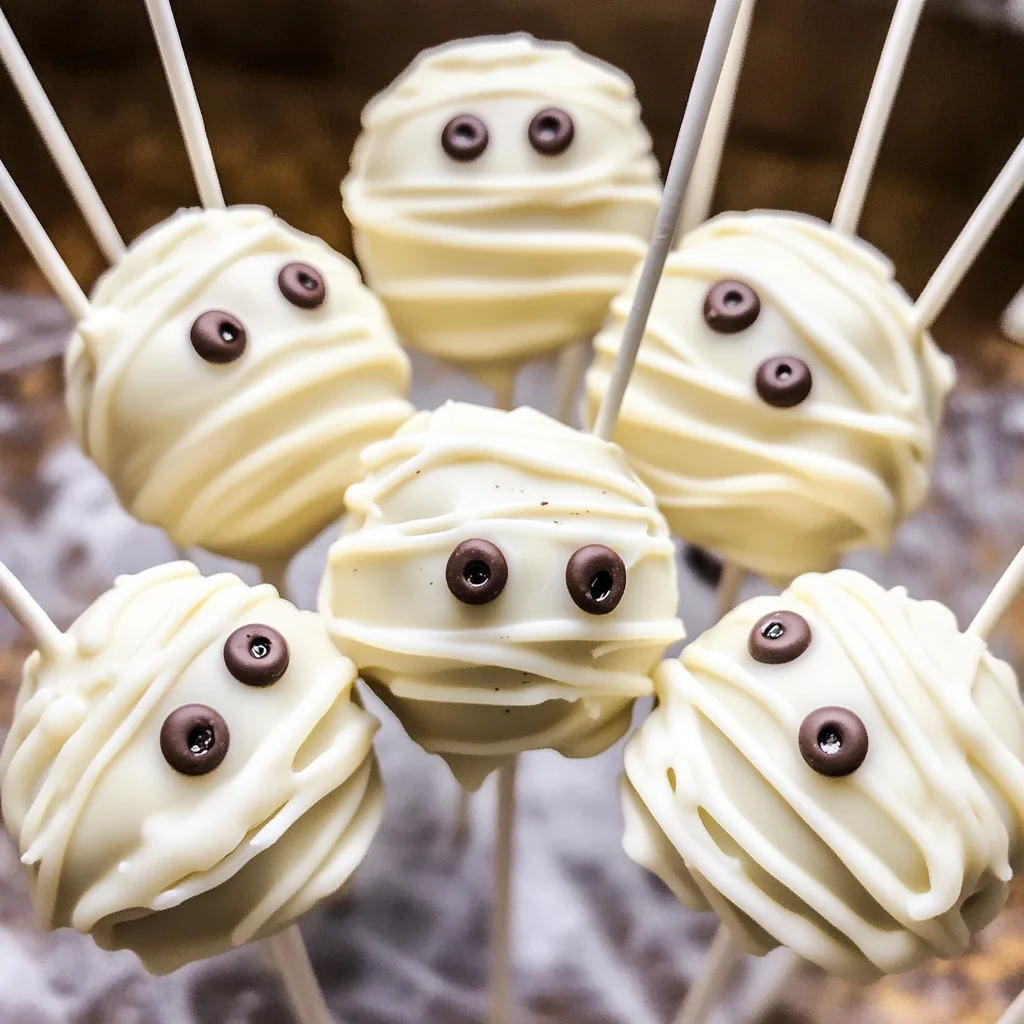
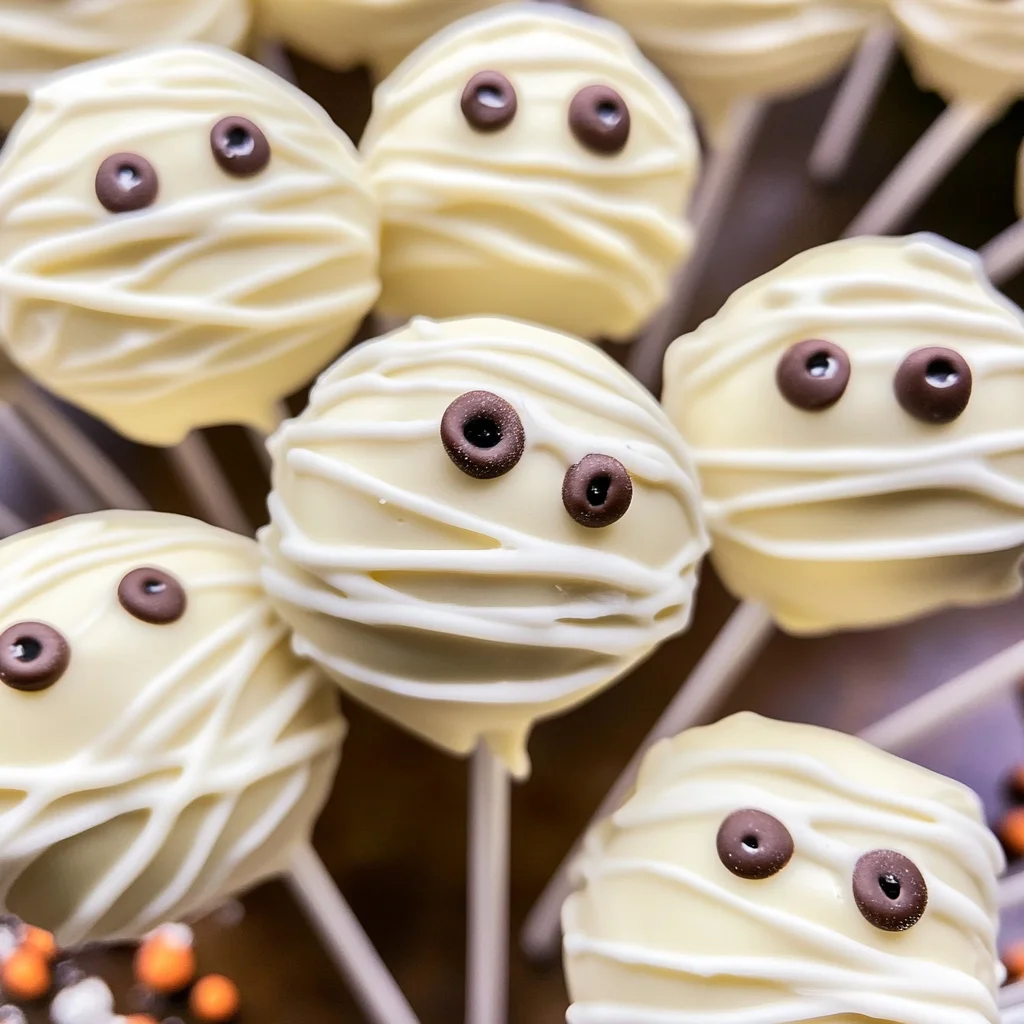
Halloween Cake Pops
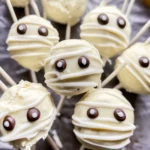
These delightful Halloween Cake Pops are the perfect treat for your spooky celebrations! With their adorable mummy design, they are not only fun to make but also healthier than traditional options. These cake pops are gluten-free, dairy-free, and lower in sugar, making them suitable for various occasions like Halloween parties, October birthdays, or pumpkin carving gatherings. You’ll love how easy they are to prepare and how impressive they look!
Why You’ll Love This Recipe
- Healthy Twist: These cake pops are gluten-free and dairy-free, so you can indulge without the guilt.
- Fun Decoration: The mummy design adds a playful touch that kids and adults will adore.
- Versatile Treat: Perfect for Halloween parties or any festive occasion where you want to impress your guests.
- Easy to Make: This recipe is straightforward and requires just a few simple steps.
- Lower Sugar Content: Enjoy a sweet treat that won’t spike your sugar levels.
Tools and Preparation
Before diving into the recipe, gather your tools to ensure a smooth baking experience. Having everything on hand will make the process quicker and more enjoyable.
Essential Tools and Equipment
- Mixing bowl
- Spatula
- Parchment paper
- Baking sheet
- Freezer-safe container
- Double boiler or microwave-safe bowl for melting
Importance of Each Tool
- Mixing bowl: A spacious mixing bowl allows for easy combining of ingredients without spills.
- Spatula: Perfect for mixing and scraping down the sides of the bowl to ensure all ingredients are well combined.
- Parchment paper: Prevents sticking, making it easy to remove cake pops after chilling.
Ingredients
To create these scrumptious Halloween Cake Pops, gather the following ingredients:
For the Cake Base
- 4 Cups Gluten-Free Vanilla Cake, Crumbled (I used my almond flour vanilla cake recipe!)
For the Mummy Decoration
- 1/2 Cup Full Fat Coconut Milk (Just the thick white part at the top of the can!)
- 1/2 Cup Dairy-Free White Chocolate Chips (I used Pascha white chocolate.)
- 2 Teaspoons Coconut Oil
How to Make Halloween Cake Pops
Step 1: Prepare the Cake Mixture
- Start by adding the crumbled cake into a mixing bowl with full-fat coconut milk.
- Use a spatula to mix until a dough forms.
- Place in the refrigerator for about 30 minutes to chill.
Step 2: Form Cake Balls
- Once chilled, roll the mixture into small balls—aim for about 20.
- Place the balls on a parchment paper-lined baking sheet.
- Freeze for about 15-20 minutes until firm.
Step 3: Melt Chocolate Coating
- In a double boiler or microwave-safe bowl, melt the dairy-free white chocolate chips with coconut oil until silky smooth.
Step 4: Decorate Your Cake Pops
- Dunk each chilled cake ball into the melted chocolate until fully coated.
- Drizzle additional melted chocolate over each pop to create a mummy look.
- Add candy eyes or two dots of chocolate to give your mummies personality!
- Place in the refrigerator to set completely before serving.
With this simple recipe, your Halloween celebrations will be even sweeter! Enjoy making these fun and festive treats!
How to Serve Halloween Cake Pops
Serving Halloween Cake Pops can be a delightful experience, especially when you present them in creative ways. These adorable treats can be enjoyed at various events, making them a fun addition to your Halloween festivities.
Creative Displays
- Cupcake Stand: Place cake pops on a tiered cupcake stand for an eye-catching centerpiece.
- Glass Jar: Fill a glass jar with cake pops and decorate the jar with Halloween-themed ribbons.
- Themed Plates: Serve on plates adorned with spooky designs for added excitement.
Fun Pairings
- Hot Chocolate: Serve with warm cups of hot chocolate for a cozy treat pairing.
- Halloween Punch: Pair with a refreshing non-alcoholic Halloween punch to complement the flavors.
- Fruit Skewers: Add fruit skewers as a colorful and healthy side option.
How to Perfect Halloween Cake Pops
Creating perfect Halloween Cake Pops is all about attention to detail and technique. Here are some tips to ensure your pops turn out great every time.
- Chill the Mixture: Ensure the cake mixture is well-chilled before rolling into balls for easier handling.
- Use Quality Chocolate: Choose high-quality dairy-free chocolate for better taste and smoother coating.
- Work Quickly: Dip the pops in chocolate quickly after melting to prevent it from hardening prematurely.
- Experiment with Toppings: Get creative with different toppings like sprinkles or edible glitter for added flair.
Best Side Dishes for Halloween Cake Pops
While Halloween Cake Pops are a delicious treat on their own, side dishes can elevate your dessert table. Here are some tasty options that pair well with these festive pops.
- Pumpkin Soup: A warm, creamy pumpkin soup adds comfort and flavor to your Halloween spread.
- Spooky Veggie Platter: Arrange green veggies like broccoli and cucumber in spooky shapes for a healthy crunch.
- Sweet Potato Fries: Crispy sweet potato fries add a sweet contrast to the cake pops while being easy to prepare.
- Cheese Platter: Include an assortment of cheeses with crackers for savory bites that balance sweetness.
- Caramel Apple Slices: Fresh apple slices drizzled in caramel provide a classic fall treat that everyone loves.
- Mini Corn Dogs: Bite-sized corn dogs make for fun finger food that complements the festive atmosphere.
Common Mistakes to Avoid
Making Halloween Cake Pops can be fun, but avoiding common mistakes will ensure they turn out perfectly every time.
- Bold Mixing Technique: Mixing the cake and coconut milk too vigorously can result in a dense texture. Stir gently until just combined for a lighter cake pop.
- Bold Chilling Time: Skipping the chilling step after forming the balls can lead to pops that lose their shape. Always chill for at least 30 minutes before rolling.
- Bold Chocolate Melting: Overheating the white chocolate mixture can cause it to seize. Use low heat and stir frequently to achieve a smooth consistency.
- Bold Decorating Details: Not drizzling enough melted chocolate can make your mummy cake pops look incomplete. Be generous with the drizzle for that authentic mummy appearance!
- Bold Storage Choices: Storing cake pops in an open container can dry them out. Use an airtight container to keep them fresh longer!
Storage & Reheating Instructions
Refrigerator Storage
- Store your Halloween Cake Pops in an airtight container.
- They will last up to 5 days in the refrigerator.
Freezing Halloween Cake Pops
- Wrap each pop in plastic wrap before placing them in a freezer-safe bag.
- They can be frozen for up to 2 months.
Reheating Halloween Cake Pops
- Oven: Preheat your oven to 350°F (175°C) and warm for about 5-7 minutes for soft cake pops.
- Microwave: Heat on medium power for 10-15 seconds, checking frequently to avoid melting too much.
- Stovetop: Place a pan over low heat and cover with a lid for 2-3 minutes, ensuring they don’t overheat.
Frequently Asked Questions
Here are some common questions about making Halloween Cake Pops.
How do I ensure my Halloween Cake Pops stay moist?
To keep your Halloween Cake Pops moist, ensure you don’t overbake your cake and use full-fat coconut milk for added moisture.
Can I customize my Halloween Cake Pops?
Absolutely! You can add sprinkles or change the decoration to match any theme or occasion. Get creative!
What toppings work well with Halloween Cake Pops?
Consider using crushed nuts, colored candy melts, or edible glitter as toppings for added flair and fun.
Are these Halloween Cake Pops gluten-free?
Yes! This recipe uses gluten-free vanilla cake, making it perfect for those needing gluten-free treats.
Final Thoughts
These delightful Halloween Cake Pops are not only cute but also versatile. Perfect for parties or casual gatherings, you can customize them with different decorations or flavors. Give this recipe a try, and enjoy these healthier treats that everyone will love!
Halloween Cake Pops
Indulge in the spooky spirit of Halloween with these delightful Halloween Cake Pops! These adorable mummy-inspired treats are not only visually appealing but also healthier than traditional cake pops. With a gluten-free and dairy-free recipe that’s lower in sugar, you can enjoy these festive bites guilt-free. Perfect for Halloween parties, October birthdays, or any autumn gathering, these cake pops are sure to impress both kids and adults alike. Their fun decoration and simple preparation make them an ideal addition to your seasonal festivities. Get ready to make some sweet memories!
- Prep Time: 30 minutes
- Cook Time: 10 minutes
- Total Time: 40 minutes
- Yield: Approximately 20 servings 1x
- Category: Dessert
- Method: Baking
- Cuisine: American
Ingredients
- 4 cups gluten-free vanilla cake, crumbled
- 1/2 cup full-fat coconut milk
- 1/2 cup dairy-free white chocolate chips
- 2 teaspoons coconut oil
Instructions
- In a mixing bowl, combine the crumbled gluten-free cake with full-fat coconut milk until a dough forms. Chill for 30 minutes.
- Roll the chilled mixture into approximately 20 small balls and place on a parchment-lined baking sheet. Freeze for 15-20 minutes until firm.
- Melt the dairy-free white chocolate chips with coconut oil using a double boiler or microwave until smooth.
- Dip each chilled cake ball into the melted chocolate, coating completely. Drizzle additional chocolate over the top to create a mummy effect and add candy eyes for personality.
- Refrigerate until set before serving.
Nutrition
- Serving Size: 1 serving
- Calories: 150
- Sugar: 8g
- Sodium: 25mg
- Fat: 10g
- Saturated Fat: 8g
- Unsaturated Fat: 2g
- Trans Fat: 0g
- Carbohydrates: 15g
- Fiber: 1g
- Protein: 2g
- Cholesterol: 0mg